
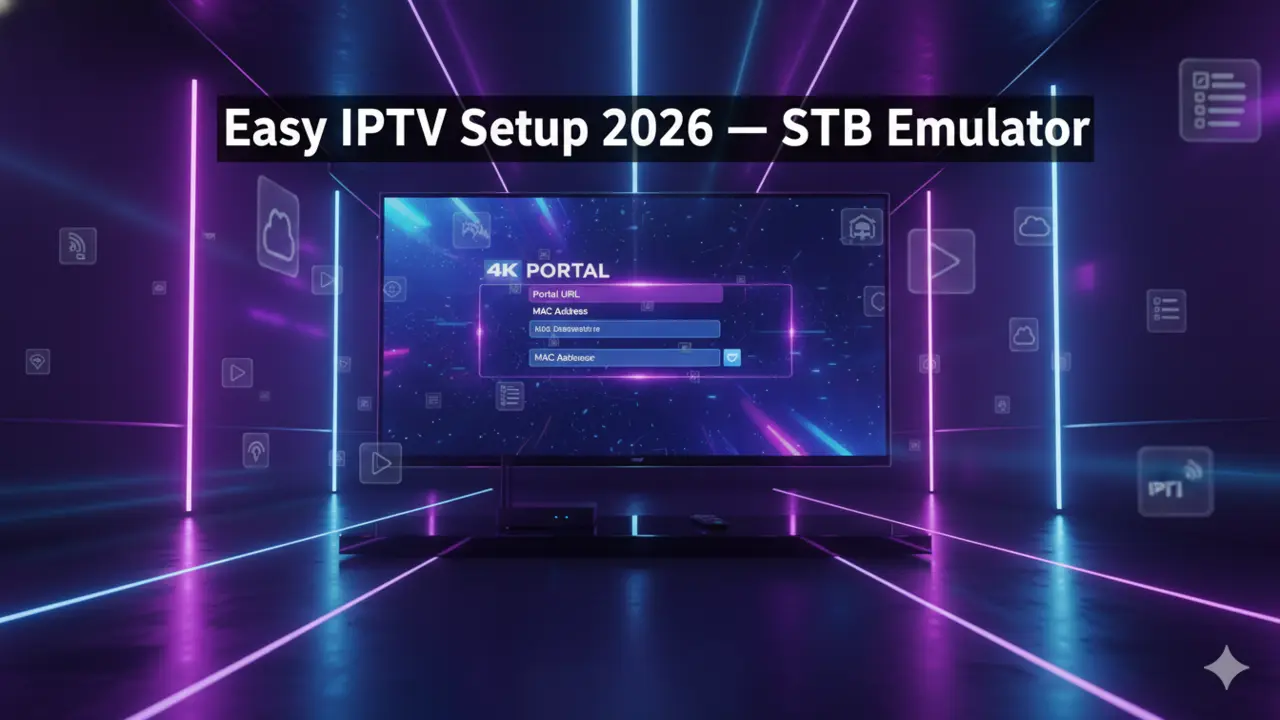
How to Set Up IPTV on STB Emulator: easy Guide 2026
Set Up IPTV on STB Emu
Set up IPTV on STB Emulator transforms your Android device into a powerful streaming machine without buying expensive hardware. You’ll gain access to thousands of live channels and on-demand content by following a straightforward configuration process that takes just minutes to complete.


What Is STB Emulator?
STB Emulator is an Android application that mimics the functionality of popular MAG set-top boxes like the MAG 250, 254, 322, and 324 models. Instead of purchasing dedicated hardware, you’re essentially running a virtual MAG box on your Android TV, Firestick, or smartphone.
The emulator works by connecting to your IPTV provider’s portal using Stalker middleware, which is the same technology that powers physical MAG boxes. This compatibility makes it a cost-effective solution for anyone wanting to access IPTV services without additional equipment.
Getting Started: What You’ll Need
Before you set up IPTV on STB, make sure you’ve got these essentials ready. First, you need an active IPTV subscription from a reliable provider—your service should support Stalker middleware or portal-based connections.
Your provider will give you two critical pieces of information: a Portal URL (which looks like a web address) and instructions about MAC address registration. Some providers assign you a specific MAC address, while others let you use the one generated by the emulator.
You’ll also need a device running Android—this could be an Android TV box, Amazon Firestick, smart TV with Android OS, or even a tablet or smartphone. The setup process works identically across all these devices.
. Fast Tutorial to Set Up IPTV on STB Emulator .
This tutorial will guide you through the simple setup instruction for STB Emulator.
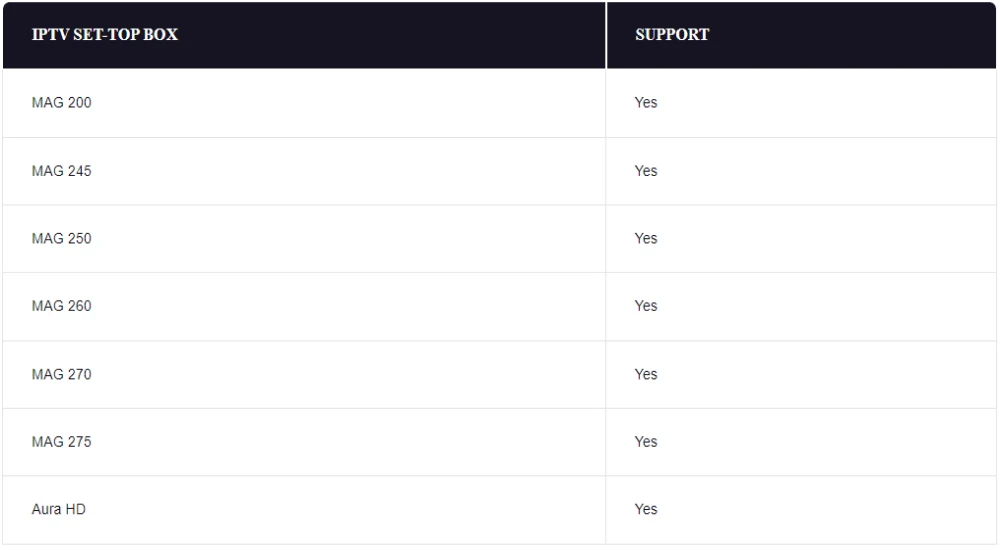
‘STB Emulator’ can emulate the following IPTV set-top boxes.
STB Emulator Setup Instructions:
- Download ‘STB Emulator’ from the Google Play Store here.
- Install and Load the ‘STB Emulator’ app and you will see your ‘MAC address’ on screen.
- Tap near the ‘Top right corner’ and then click ‘Settings’ – the 4th icon from the right.
- Tap ‘Profiles’.
- Tap ‘Test portal’ to modify the existing profile or ‘Add profile’ to start a new one.
- Tap ‘STB Model’.
- Tap ‘MAG 250’ or whichever STB you wish to emulate.
- Tap ‘Portal settings’.
- Enter your ‘Portal URL’ (Check your activation e-mail) and click OK.
- Now tap ‘Screen Resolution’.
- Choose ‘1280×720’ (You can choose higher with internet speed 16+ Mbps).
- Exit the app and restart.
- You will now see your channel list.
Troubleshooting STB Emulator
If you have any problems viewing the Channels please follow this recommended fix:
Restart your App, Device/Box, and Wi-Fi Router.
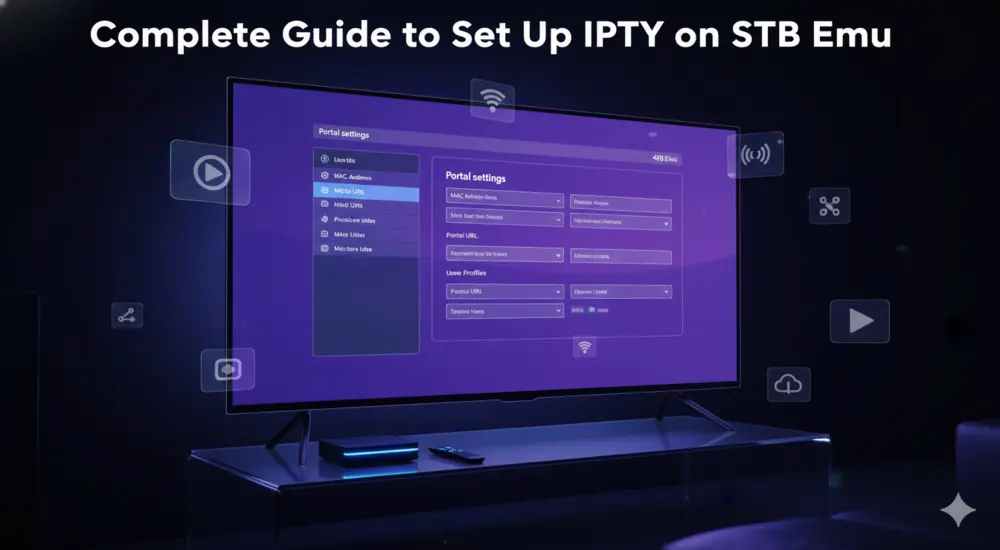
. Complete Guide to Set Up IPTV on STB Emu .
Learn how to quickly set up IPTV on STB Emu and get your channels running in minutes with simple, clear steps.
Installing the STB Emulator App
Head over to the Google Play Store on your Android device and search for “STB Emu” or “STB Emulator.” You’ll find both a free version and a Pro version—the free version works perfectly fine for most users and includes all the features you need to install IPTV on STB.
Download and install the app just like any other application. The installation takes less than a minute on most devices with decent internet speeds.
Once installed, launch the app for the first time. You’ll typically see a configuration screen prompting you to set things up—if it doesn’t appear automatically, don’t worry, we’ll access it manually in the next steps.
Configuring Your IPTV Service
When you first open STB Emulator, press and hold the OK button on your remote control for a few seconds. This brings up a dropdown menu where you’ll select “Settings”.
Navigate to the “Profiles” section and click on “New Profile” on the right side of your screen. You’ll see a numbered profile created—click on it to start customizing.
Setting Your Profile Name
Select “Profile Name” and change it to something meaningful, like the name of your IPTV subscription service. This helps you stay organized if you ever add multiple IPTV providers down the road.
Entering Portal Settings
Go back one level and select “Portal Settings,” then click on “Portal URL.” You’ll need to delete the default Stalker portal that’s pre-loaded in the app.
Enter the exact Portal URL provided by your IPTV service provider—be careful here, as even a single wrong character will prevent your connection from working. Double-check for typos before saving.
Configuring the MAC Address
This part trips up a lot of newcomers, but it’s actually straightforward. Go back to the main settings menu and select “STB Configuration,” then click on “MAC Address”.
STB Emulator generates a MAC address automatically when you install it. This address always starts with “00:1A:79:” followed by six additional characters. You’ll need to provide this complete MAC address to your IPTV provider so they can authorize your device.
If your provider gives you a specific MAC address to use, you’ll need to enter it manually. Make absolutely certain you type it correctly—MAC addresses use colons between each pair of characters, like this: 00:1A:79:03:E7:36.
Some providers let you register your MAC address through a customer dashboard, while others require you to send it via email or live chat. Check with your specific IPTV service about their registration process.
Selecting Your Device Model
While still in STB Configuration, you’ll see an option for “STB Model” or device type. Most modern setups work best with MAG 324 selected, as it offers the widest compatibility with current IPTV portals.
If you experience issues later, you can come back and try MAG 254 or MAG 322 instead—different providers sometimes work better with specific models.
Screen Resolution Settings
Set your screen resolution to “Auto” unless you know your TV’s exact resolution. The automatic detection works reliably on most devices and prevents picture quality problems.
Saving and Launching Your Setup
After entering all your configuration details, navigate to “Save and Restore Settings” and select “Save Settings and Profiles”. This ensures your changes are permanently stored.
Exit the STB Emulator completely by holding the OK button again and selecting “Exit” from the dropdown menu. Don’t just press the back button or home button—actually exit the application.
Restart your device to ensure all settings take effect properly. When you reopen STB Emulator, you should see a yellow loading bar as the app connects to your IPTV provider’s server.
If everything’s configured correctly, you’ll be greeted by your IPTV interface showing available channels and content. The first connection sometimes takes 30-60 seconds, so give it a moment to establish the link.
Troubleshooting Common Setup Issues
Even with careful setup, you might run into a few hiccups. Here’s how to handle the most common problems when you set up IPTV on STB Emulator.
Connection Errors
If you see a message saying “Please contact your provider to register this device,” your MAC address likely isn’t registered yet. Go back into STB Configuration and try changing the STB Model to a different MAG version, then reset the Device ID by checking the reset option in settings.
Exit the app completely and restart it. This “tricks” the server into seeing your device as newly connected, which often resolves authentication issues.
Buffering or Playback Problems
Buffering usually stems from network issues rather than app configuration. Close any background apps consuming bandwidth, restart your router and modem, and make sure your device has a strong Wi-Fi signal.
You can also try changing the media player within STB Emulator—hold the OK button, scroll to “Media Player,” and test different options to see which performs best with your IPTV service.
Missing File Errors
When channels or VOD content won’t play and you get a “missing file” error, it’s typically a temporary glitch. Try reloading the file or switching to a different media player in the app settings.
Exiting and restarting STB Emulator also clears these errors in most cases. Always properly exit the app rather than just switching away from it.
Optimizing Your IPTV Experience
Once your basic setup works, you can fine-tune things for better performance. Consider erasing the serial number in STB Configuration if you want the flexibility to use your IPTV subscription on multiple devices without being locked to one box.
Create multiple profiles if you subscribe to different IPTV services—this lets you switch between providers quickly without re-entering portal information each time.
Get into the habit of properly exiting STB Emulator when you’re done watching. Hold the OK button and select “Exit” rather than just pressing home. This prevents the app from running in the background and causing conflicts when you return.
Understanding IPTV Subscription Compatibility
Not every IPTV subscription works with STB Emulator—the service must support Stalker middleware and portal-based connections. When shopping for an IPTV provider, specifically ask whether they’re compatible with STB Emulator or MAG boxes.
Quality IPTV services that work with STB Emulator typically offer thousands of channels, VOD libraries, and reliable uptime. Look for providers that give you trial periods so you can test the service before committing to a long-term subscription.
The best providers for STB Emulator setups include services that offer dedicated customer support for MAC address registration and portal configuration, since these are the most common stumbling blocks for new users.
Maintaining Your Setup
Your STB Emulator setup generally runs smoothly once configured, but occasional maintenance helps prevent problems. If channels suddenly stop working or you get authentication errors, your provider might have changed their portal URL—check with them for any updates.
Keep your STB Emulator app updated through the Google Play Store. Updates often fix bugs, improve compatibility with newer IPTV portals, and enhance performance.
If you’re experiencing persistent freezing or channel dropouts, try uninstalling and reinstalling the app completely, then re-enter your configuration. This fresh start often resolves issues that simple troubleshooting can’t fix.